-
Video Converter
 For Windows
- Video Converter Ultimate

 For Mac
-
Multimedia
 For Mac
-
Utility
 For Windows
- Video Downloader

 For Mac
 For Windows
 For Mac
 For Mac
 For Windows
 For Mac
To capture what's going on your screen specifically on a Chromebook is what can simplify things to the next level. It is a very prevailing method for teachers to teach students and help them learn. Teachers simply can record with screen recording software for Chromebook on their tutorials, lessons, sub plans, and feedback and present them to the students which will ease the process of grasping and understanding concepts.
Not only teachers, but students can also use free Chromebook screen recorder so as to share their projects and reports, further explain them, or even present a code they are developing. Screencasting truly stands for the well-known phrase-A picture is worth a thousand words. Well, imagine the value of a screencast then! In the below article we will present you with the best screen recorder for Chromebook.
Once you’ve installed the program and opened it on your computer, the screen recorder dashboard will pop up on your desktop:
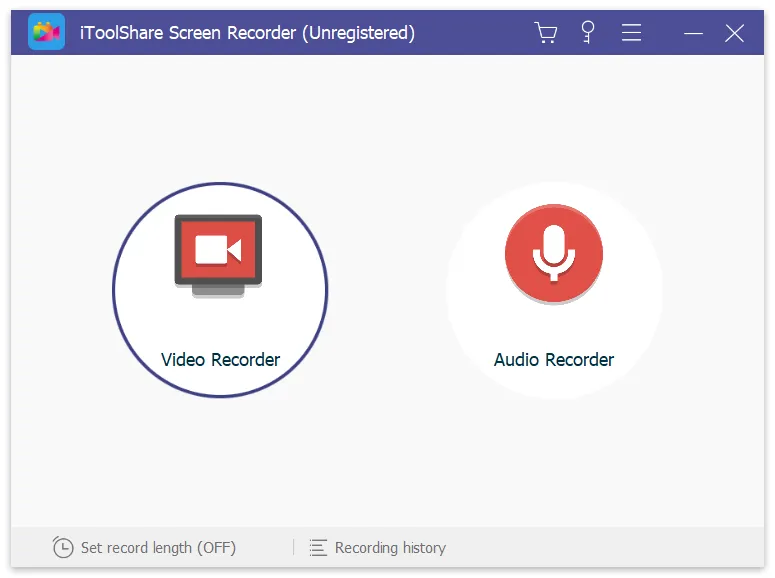
The iToolShare interface is rather intuitive, so you will be able to figure it out even if you are a complete non-techie.

You have two options
Option A: to record an area of the screen, choose the 'Select a recording area' or 'Rectangle on a screen' menu.
Option B: alternatively, to record the entire screen, select 'Fullscreen' on the dropdown menu and choose your monitor.
Click the Rec icon on the recording panel to start capturing the video. If the Show countdown option is enabled, the recording will start after the countdown. Otherwise, it'll begin right away.

In recent months, Google has added a Screen Capture application to Chrome OS that not just allows you to record your screen, alternatively, with sound, yet additionally incorporates another approach to take screen captures. This is valuable since screen recording on a Chromebook recently required outsider augmentations or applications. Screen capture support has for some time been incorporated into Chrome OS. You can now press Ctrl + Show Windows to catch a PNG of everything on your screen. Or on the other hand, press Ctrl + Shift + Show Windows and afterward snap and drag to catch a particular rectangular or any shaped territory.
Step 1: Open the Recorder: Click in the lower-right corner where the Wi-Fi, battery, and clock indicators display.
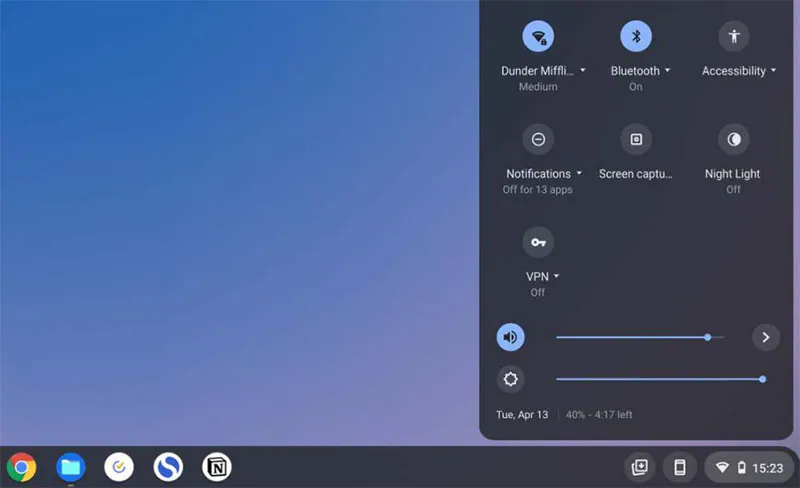
Step 2: Select Screen Capture: In the next step, select either Capture (image) or Record (video). Optionally, if you select Record, you also may select the sprocket and then switch audio recording from the microphone on or off.

Step 3: Modify the Area to Be Captured: You can either select the full screen, a portion of the screen, or a window. If you decide to catch or record a segment of the screen, snap and drag to determine the segment to catch. Something else, click anyplace on the screen to either catch your picture or begin recording. At the point when completed the process of recording, click on the red record button that shows on the correct side of the rack to quit recording.
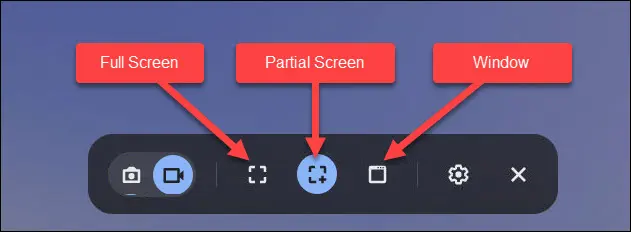
Step 4: Save the Recording: A three-second countdown will appear on-screen and then the recording will begin. When you’re finished recording, click the red stop button on the Shelf.
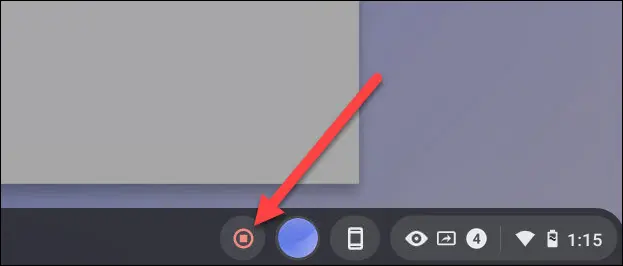
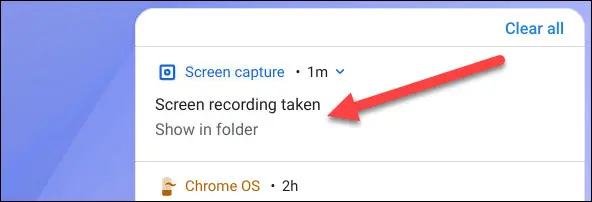
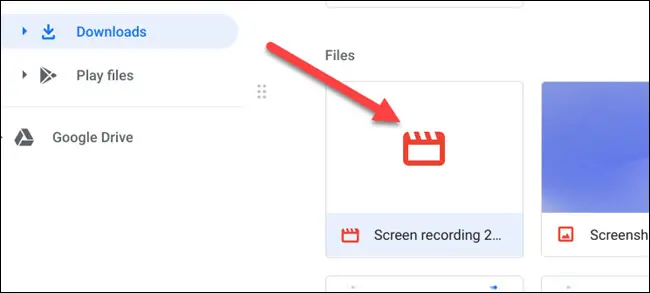
Step 5: A notification will appear after that says “Screen Recording Taken.” Click it to go to the video file in your “Downloads” folder.
Step 6: The folder will open and you can select the video file to watch, share, save to Google Drive, or delete the recording.
Can I use iToolshare Chromebook Screen Recorder on any Chromebook model?
Does iToolshare Chromebook Screen Recorder require any installation or downloads?
Can I share the recorded Chromebook with others?